The idea behind “Tardigrades In Space” is to explore the wondrous “innerverse” of microbiology. Puppets, models and special effects will present educational adventures reminiscent of “Magic School bus,” with campy comedy akin to the Muppet Show’s “Pigs in Space.” This blog entry journals the sculpting and fabrication of Tardigrade PUPPETS (version 2.0) styled on the upright FIGURINES described in a previous blog. <hyperlink>.
The puppets are just over two feet tall, and will be operated by one or two puppeteers depending on required manipulation for particular camera angles. Casting these puppets required another new learning curve as I become ever better at prepping molds and pouring polymers.
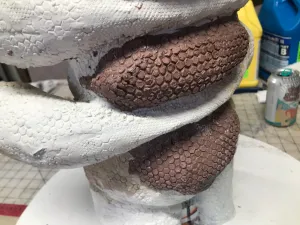
But each casting inevitably has a few imperfections; and repairs with secondary foam can produce wonky textures and drips. It seemed right to leave those imperfections, and even embellish them, as evidence of each living creature’s unique representation on Earth. When microscopic animals are photographed at high magnifications, their surfaces typically look rough and wild (e.g., electron micrographs of actual tardigrades, flies, and other minute animals).
If my fictitious tardigrades represent animals measuring less than a millimeter, it makes sense to include bumps and scales, gaps and wrinkles. Educationally, this realism affords teachable content about diversity, anomalies and defects in the human experience.
Puppet 2.0 Fabrication
Fabrication followed the same procedures as the first Tardigrade Puppet 1.0. (which I made exactly one year ago!):
[a] Sculpt the object using polymer clays over a styrofoam and metal-screen overlay;
[b] coat the sculpture with a thick layer of silicone rubber;
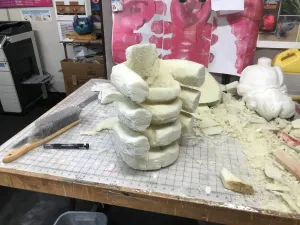
[c] build a rigid support shell around the silicone with plaster (or in the case of Puppet 2.0, rigid expanding foam);
[d] cut open the silicone and remove the clay sculpture;
[e] put the hollow silicone mold back together and strap it into the rigid shell;
[f] pour flexible expanding foam through a hole, which expands to fill the entire mold;
[g] remove the cured foam casting and prep the body for armatures (arm rods, puppeteer hand access); and finally,
[h] finish the puppet with fabric paints, feathers and other materials.
This larger puppet required three separate molds: head, body, and hands. The head and body molds are fitted with void-creating spacers so that the expanding foam will leave a hollow area within; this reduces the amount of manual clipping out of cured foam after casting, and also conserves the expensive SmoothOn™ chemicals I purchase from Reynold’s Materials in Seattle, WA.
STARTING WITH THE HEAD
My younger brother James had gifted me with a large styrofoam ball encased in paper machet and painted PeptoBismal pink. This was an inside joke from childhood, when my brothers would hide my favorite antique Christmas Tree ornament because it was, to be honest, a large and ghastly glass sphere.
I also crafted an internal void-mold in the shape of my hand, to create an open space within the head for a puppeteering. This space was modified with blade-cut pockets to fine-tune access for the puppeteer’s hand to create facial expressions.
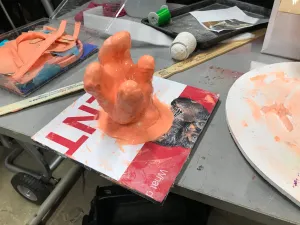
My first expanded-foam casting created a soft and pliable puppet head.
For subsequent castings, I pre-poured a flexible rubber skin against the mold face, then assembled the silicone mold and rigid mother-mold, and injected expanding foam to create a cast head with durable rubber cheeks, forhead and eyelids.
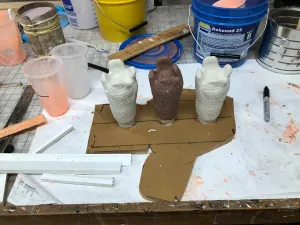
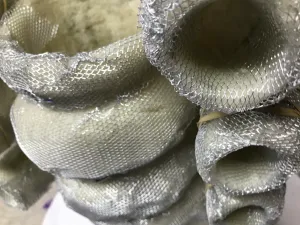
[1] Head Sculpture in-process compared with the three-inch figurine; scaled-up photos of the figurine are in the background.
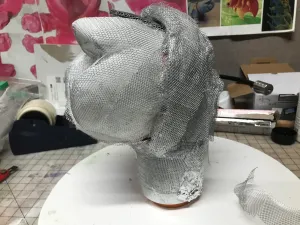
[2] Completed head sculpture covered with pliable aluminum screening. Like stucco, modeling clay requires a textured substrate.
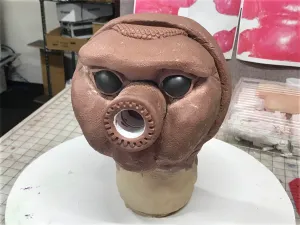
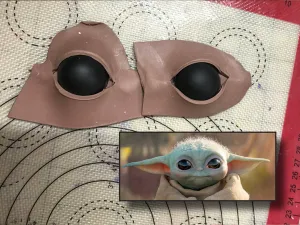
[3] The eyes were loosely based on “Baby Yoda’s” deep-pool-like peepers. I used pingpong balls for the sculpture.
[4] Head sculpture ready for silicone mold-making. The snout is a separate piece, and the version pictured did not end up as the final snout design.
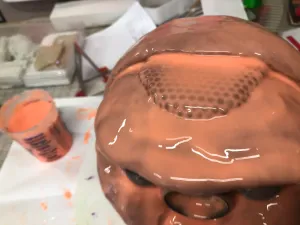
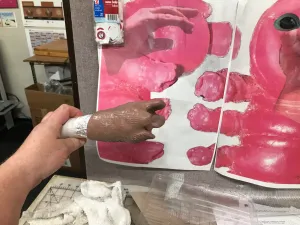
[5] An initial “paint layer” of runny silicone is always applied to capture the finest details and textures from the master clay sculpture.
[6] Then the entire piece is encased in a layer of thickened silicone. This shell will eventually be cut open, the clay sculpture removed, and expanding foam injected.
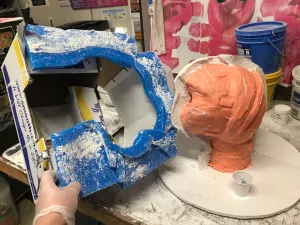
[7] I built a temporary “coffer dam” to separates the head into two hemispheres. Plaster gauze (on the far side of the head in this view) creates the first half of the “mother mold”, a rigid shell that keeps the expanding foam from distorting the soft silicone inner mold.
[8] Tinfoil serves to keep the second plaster shell from adhearing to the first one. Note the raised cubes of silicone; these help register the silicone mold within the plaster shell.
[9] I made a temporary alginate mold and plaster casting of my hand, then added to it using plaster gauze. This was coated with silicone and will be inserted into the finished head mold to create a void within the expanded foam for the puppeteer’s hand to manipulate facial features from within.
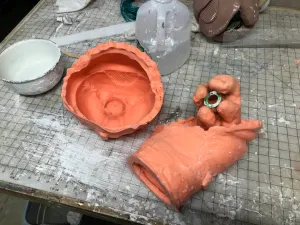
[10] Here are the three parts of the head mold before assembly and placement within the plaster mother mold.
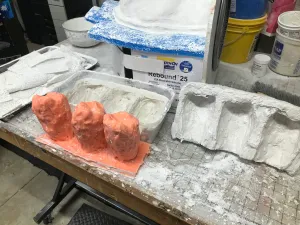
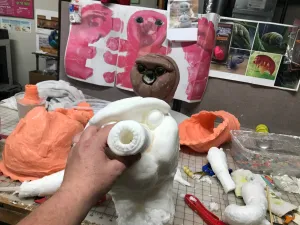
[11] Left-to-right: Clay sculpture, plain foam head, foam head with urethane rubber skin, which was painted to the inside of the silicone mold before assembly and foam pouring. The rubber skin reproduces fine details precisely and adds durability to the resulting cast.
[12] Real tardigrades have eight claw-like feet. The puppets, like the miniature figurines, stand upright on two feet, with six “hands”. Here is the initial clay sculpture.
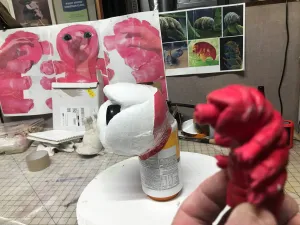
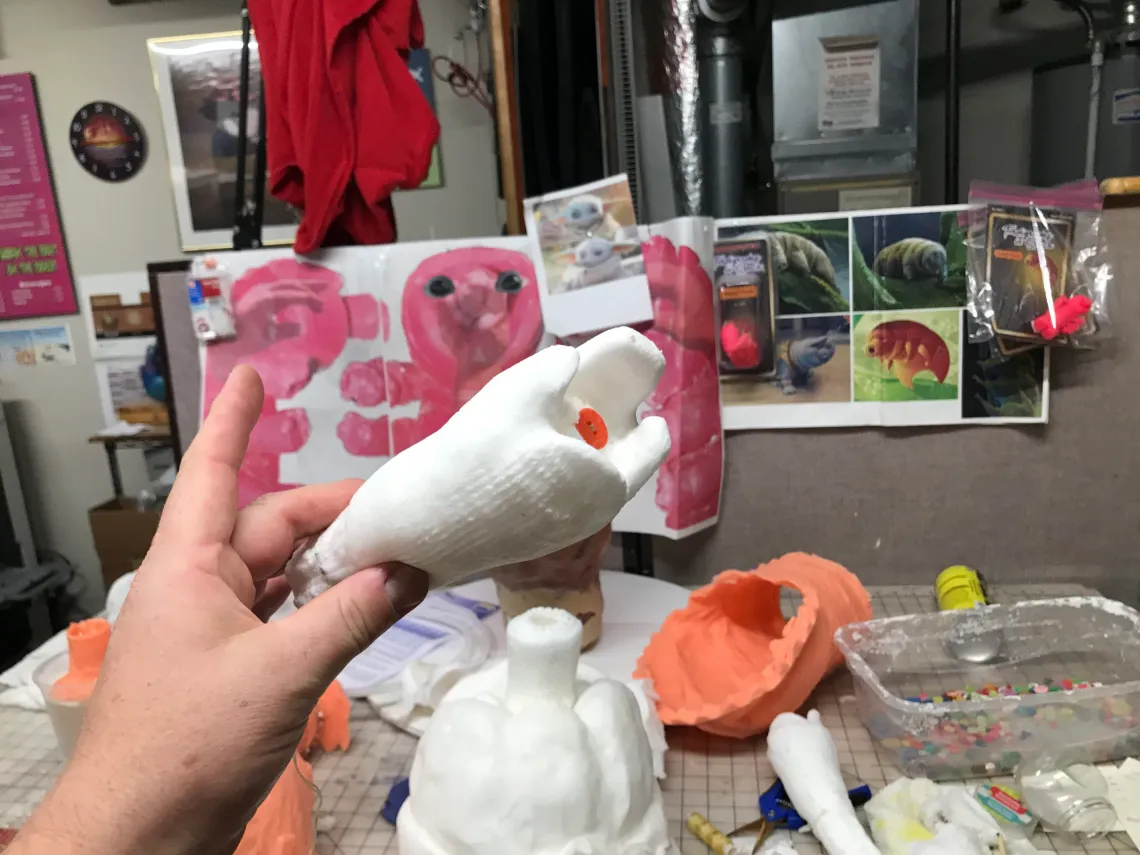
[13] The clay hand held next to an enlarged photo of the tiny figurine on which the puppets are based. Note the image of my hand superimposed within the head, which approximates where the head-void shape will be placed within the head mold.
[14] Like the head-mold void piece, I created a temporary alginate mold of the clay hand and was able to make two plaster castings before the mold began to crumble. Alginate is basically powdered kelp/seaweed primarily used as a food thickener.
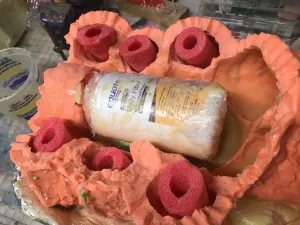
[15] The hand mold makes three hands, and each puppet requires six. Here is the three-up silicone mold next to its plaster mother mold.
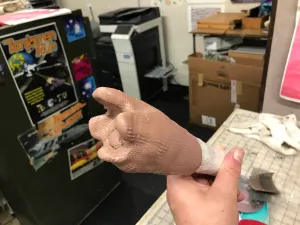
[16] A foam hand casting fresh from the mold. I experimented with a button-and-cord to squeeze the hand closed when the string is pulled. Unfortunately, it did not work like a traditional cable-pull used in Hollywood puppets.
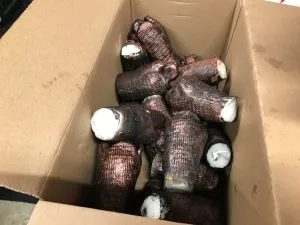
[17] Even though the puppets will each be uniquely colored with paints and feathers, I decided to make the hands all the same, as seen here in a box awaiting assembly.
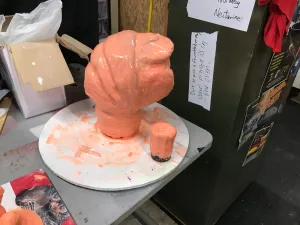
[18] The next task was to sculpt the puppet body. I created a block of rigid foam for the rough carving by purchasing a pouch of fence-post foam from Home Depot. Typically used to fill in a post hole which sets in minutes, I poured it into a waste basket and roughed out the body shape with a serrated drywall saw. The inset diagram is sketched from a cross-section of a figurine body, minus the hands.
[19] What a mess! The rigid foam was highly static and stuck to everything like gritty beach sand. Here the rough body has a recessed neck area where a head will eventually be inserted. It does not het have the upright feet.
[20] I covered the rigid foam with aluminum mesh so the clay and plasticine modeling compounds would adhere to the surface. Note the arms have also been hollowed out, as foam hands will eventually be glued into place.
[21] The brown Monster Clay™ is actually a wax-based compound that is stiff and carvable at room tempurature, but can be softened in a microwave or even melted in a crockpot over and over. I had a supply of white Sculpy™ plasticine on hand, so used it as well, though it remains soft at room tempurature, and is typically oven-baked to hardness…the exact opposite of the brown clay. You can also see a small amount of beige plasticine that is never meant to be exposed to heat.
Knowing that much of the sculpture would tear and crumble when I removed it from the silicone mold, I simply used up materials I had in stock rather than build the entire sculpture with expensive Monster Clay.
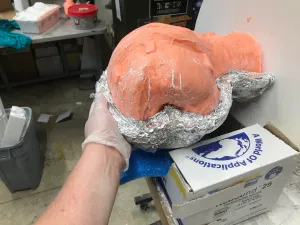
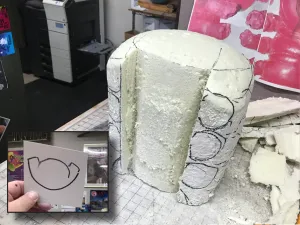
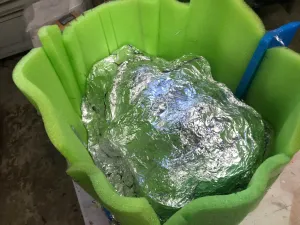
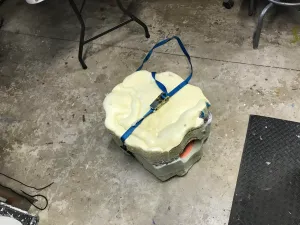
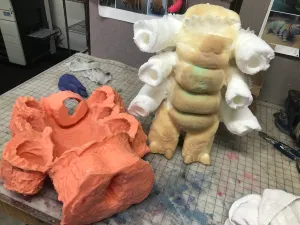
[22] Like the head sculpture, I coated the body with thick silicone, then built up a coffer dam using Dollar Tree expanded foam swimming kick-boards.[23] Rather than make a heavy plaster mother mold, I poured rigid foam liquid to create the first half of the mother mold, then flipped it over, and poured the other half. The silicone is covered with foil and plastic wrap to soften the contours and make the mother mold easier to put on and take off the silicone mold.
[24] The silicone mold has a thick seam all around it, which I cut apart in zigzag fashion to remove the clay sculpture inside. Like the head, I installed a void-piece to conserve expanding foam and create a hollow center. I ended up NOT using pool-noodle inserts in the arms because it would have been too difficult to get the liquid foam into the fight gap.
[25] I then reassembled the silicone mold using foral pins.
[26] Here is the rigid foam mother mold strapped around the silicone inner mold and ready for casting.
[27] I experimented with brushing urethane rubber inside the mold before pouring in the expanding foam.
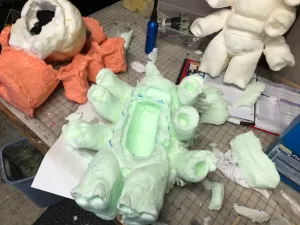
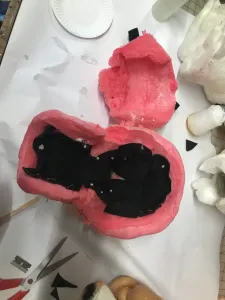
[28] And here is a foam casting with the chest removed to reveal the follow center. I ended up switching to removing the void piece through the back, as it would allow me to install armatures and work them from behind during video production.
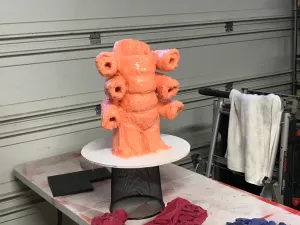
This one is tinted with green pigment, which isn’t necessary as the entire body will be painted with acrylic fabric paints.
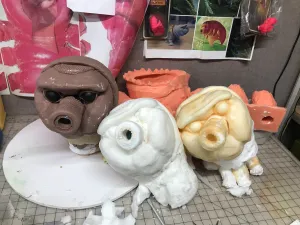
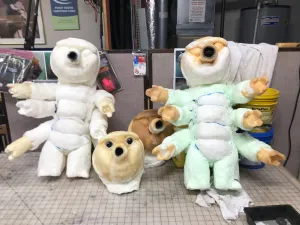
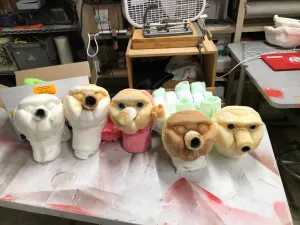
[29] Two of five castings temporarily assembled prior to painting and finishing.
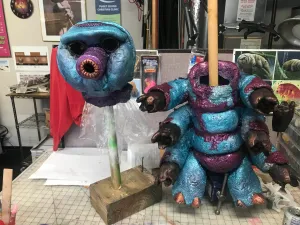
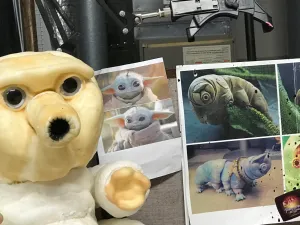
[30] Some of the heads have large “teddy bear eyes” I purchased online, seen here next to baby Yoda and a micrograph of a real tardigrade.
[31] The snout will either be glued into place, or held on with a button and wire. If I ever figure out how to articulate the snout with internal mechanisms, I can upgrade the snouts so they will be able to move with puppet dialog.

[32] After customizing the void-space with a razor knife, I lined the cavity with soft neoprene fabric for added durability and puppeteer comfort.
[33] Five heads NOT in a duffle bag awaiting their bodies and paint jobs.
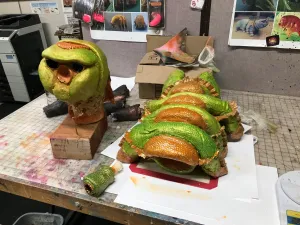
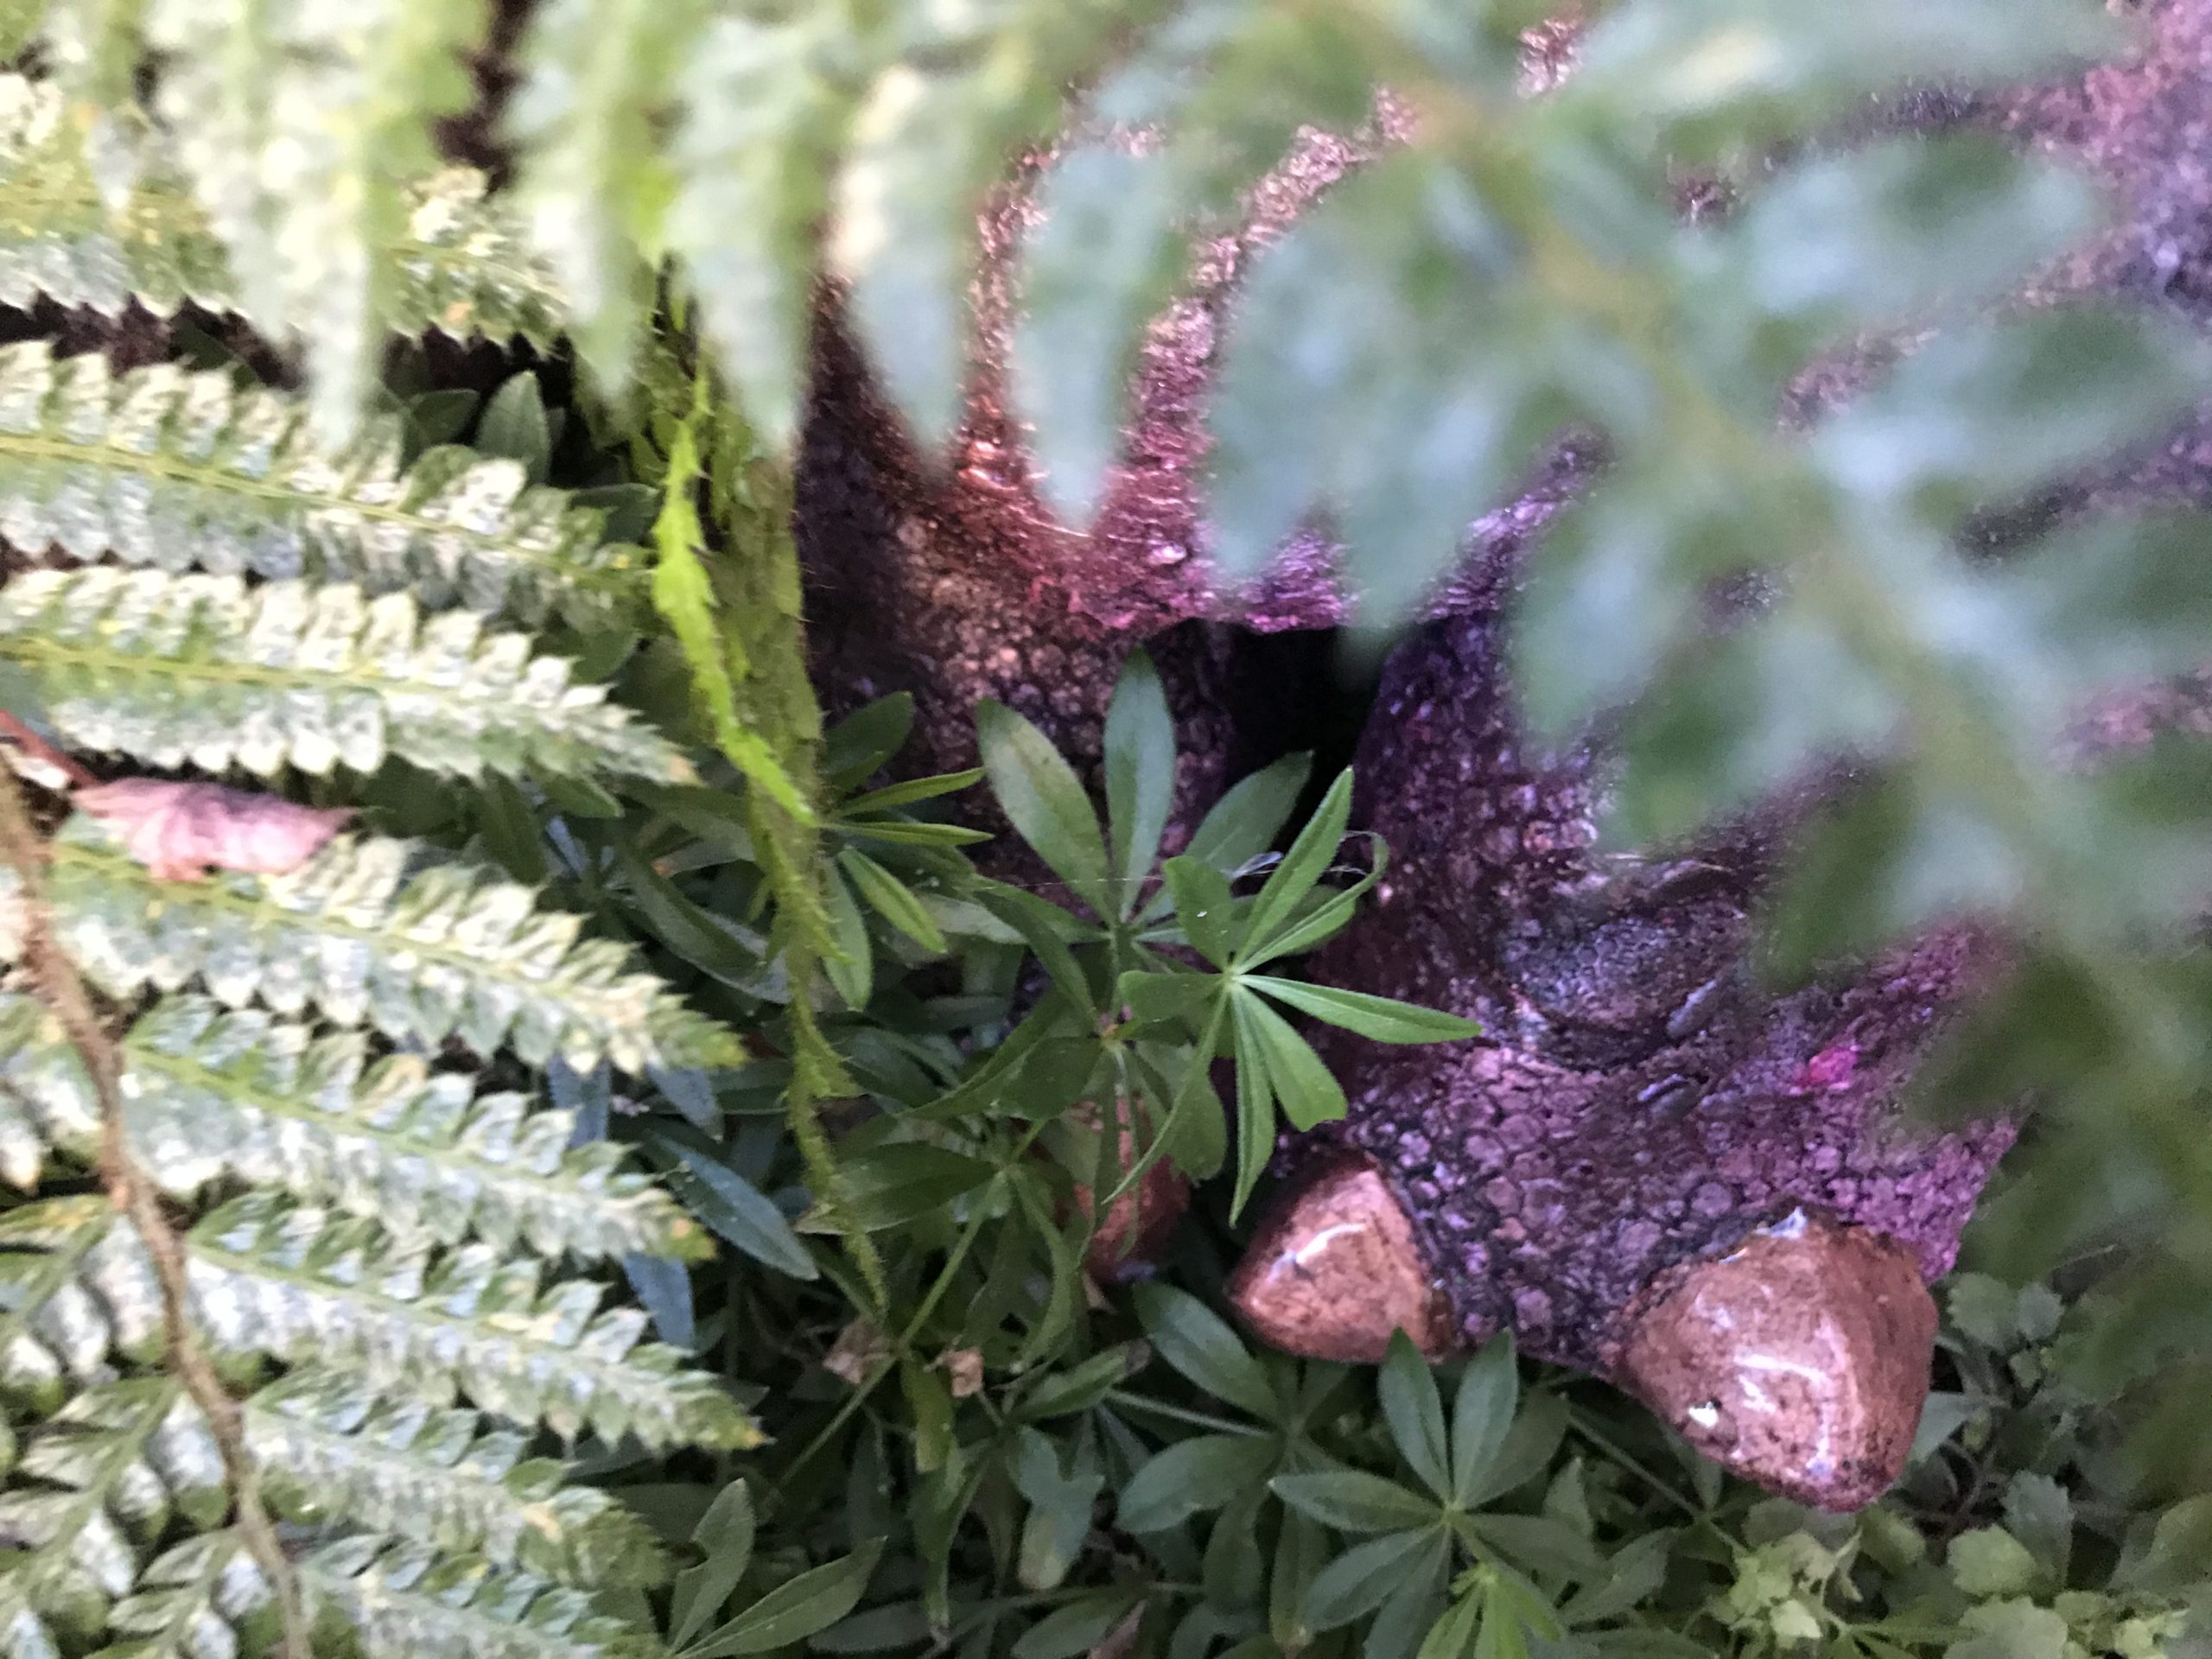
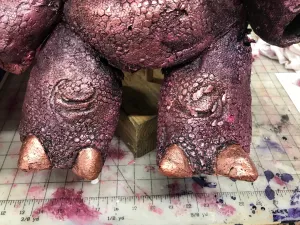
[34, 35] Here is an image of the original sculpted feet, compared to a partially finished foam casting. After applying a dark primer, I decided to make all of the top paint colors metallic and irridescent.
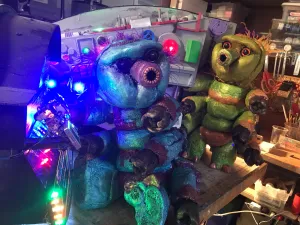
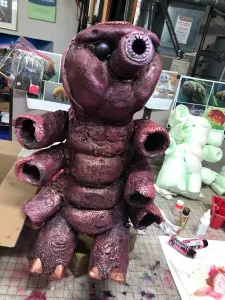
[36] The purple tardigrade was the first of five, shown here without hands. The eyes are simply the original expanded foam as it came out of the mold, painted black and coated with clear rubber.[37, 38] Puppet number five is lime green with orange accents and teddy bear eyes. Feathery “hairs” would later be added (similar to the ostrich-feather hairs on Jim Henson’s drum-playing Muppet “Animal”.
[37, 38] Puppet number five is lime green with orange accents and teddy bear eyes. Feathery “hairs” would later be added (similar to the ostrich-feather hairs on Jim Henson’s drum-playing Muppet “Animal”.
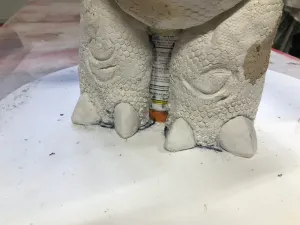
[39] For realistic head turns and facial expressions, a puppeteers hand will be inserted into the head through a back-flap on the body. But for full body shots, the heads will be mounted on a void-shaped chunk of rigid foam and a section of PVC pipe. The pipe extends through the hollow body and plugs into a hole between the feet. This keeps the extremely flexible body upright, and can even be used to mount the puppet to an external rod for gross body movement within the spaceship set.
Hiding below camera view, the puppeteer can reach up behind the mounted puppet and manipulate the internal arm wires without also having to support the weight of the puppet as well.
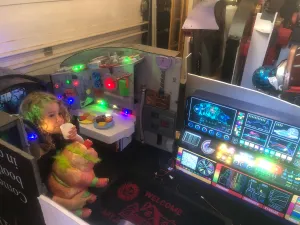
[40] I staged some test photos and videos on my workbench using a partial cockpit set.
[41] When I put up the entire set on the garage floor, my granddaughter Lydia was inspired to have a “Tarigrade Tea” with one of the smaller first-generation puppets.
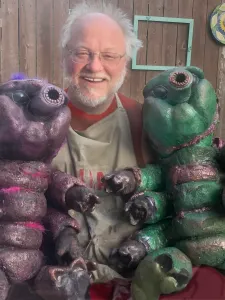
[42] And lastly, Mr.Anderson poses with two puppets to show their actual size.
Coming Soon: VIDEO!